Hey fellow anime enthusiasts, gamers, and figure collectors over at Diipoo!
If you're anything like us, your collection likely features some of the most expressive and adorable figures out there: https://www.diipoo.net/pages/nendoroid. These little guys aren't just static collectibles; their charm lies in their incredible posability, wealth of accessories, and perhaps most importantly – those interchangeable face plates that let us capture every single mood, meme, and iconic moment from our favorite series!
Giving your Nendoroid that perfect grin, a shocked gasp, a determined glare, or that ever-so-slightly blush can instantly bring them to life, transforming your display shelf into a dynamic scene right out of your favorite anime or game. It's all about giving these pint-sized heroes and heroines personality!
But let's be honest, for newcomers or even seasoned collectors who haven't tried it yet, the thought of popping off a Nendoroid's face or pulling their head apart can be a little intimidating. What if something breaks? What if the paint scratches? Don't sweat it! Swapping Nendoroid face plates is actually quite simple and safe once you know the basic steps and a few handy tricks.
Today, we're going to walk you through the process step-by-step. We'll cover everything you need to know to confidently change your Nendoroid's expression, letting you unlock a whole new level of fun and customization with your collection!
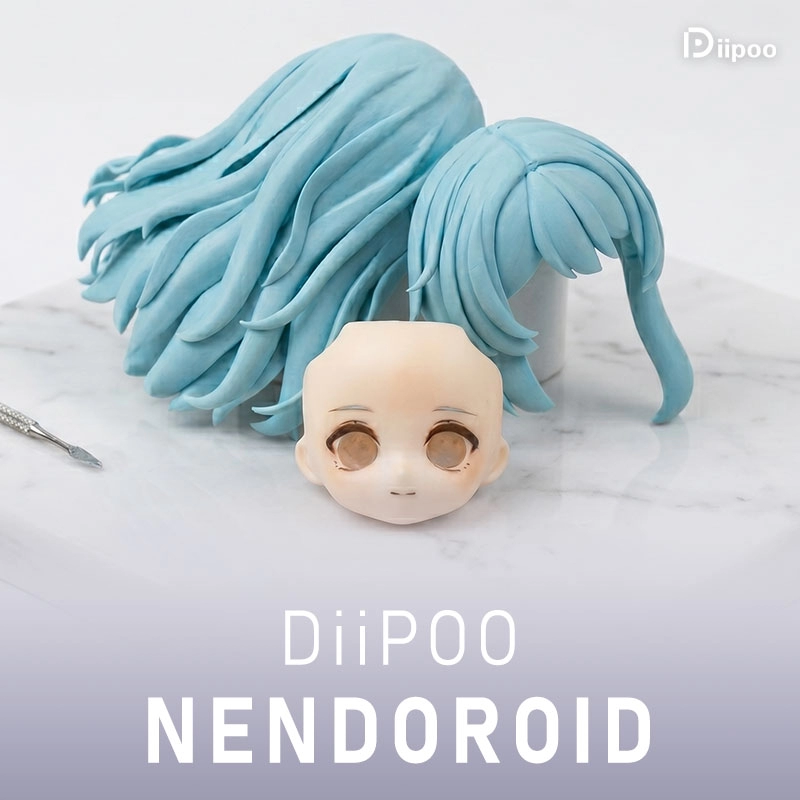
Before we dive into the how-to, it helps to understand the basic anatomy of a typical Nendoroid head. Most standard Nendoroid heads are cleverly designed to be modular. They usually consist of three main parts: the front hair piece, the face plate (which holds the expression), and the back hair piece. These parts fit together using pegs or simple friction, and the entire head connects to the body via a neck joint, making the whole structure easy to disassemble and reassemble. This modular design is precisely why changing faces (and sometimes even hair!) is so straightforward.
It's worth noting that there are generally two types of Nendoroid head structures when it comes to disassembly (mostly referring to standard GSC Nendoroids):
- Nendoroids with Removable Heads: This is the most common type. The entire head easily pops off from the body's neck joint, and crucially, the front hair and back hair pieces can be readily separated from the face plate. This design offers maximum flexibility for swapping faces, front hair, and even mixing and matching parts between compatible figures.
- Nendoroids with Non-Removable Heads (or less separable components): While less common for standard releases meant for extensive customization, some older or special-design Nendoroids might have heads where the front hair, face, and back hair are very tightly fitted, fused, or designed as a single unit that isn't meant for frequent separation. This guide primarily focuses on the first, standard type, which makes up the vast majority of the Nendoroid line. If you encounter a figure where the head components feel permanently attached, forcing them apart is not recommended.
With that basic understanding, let's get to the action!
Here are the steps for changing your Nendoroid's face plate:
Step 1: Gearing Up – Preparation is Key
Just like any delicate operation, starting with the right preparation will make the whole process smoother and safer.
Check Model and Compatibility: First and foremost, confirm which Nendoroid model you have and that the face plate you want to use is compatible. Good Smile Company (GSC) Nendoroid face plates are generally interchangeable among standard releases, but there can be exceptions (e.g., some very old models, or figures with unique head sculpts or joint designs). If you're using third-party bodies (like Obitsu 22/24), they often require specific face plates or adapters designed for their neck joints, as standard GSC faces won't fit directly. When in doubt, a quick online search or checking official documentation for your specific figure is always a good idea.
Gather Your Tools (Optional but Helpful): You can often swap faces with just your fingers, but having a few small tools on hand can be useful, especially if parts are stiff.
- Tweezers or Needle-Nose Pliers: These can help get a grip on smaller or tighter connection points, or gently pry edges. Use with extreme caution to avoid scratching paint or snapping delicate plastic. Only use them on non-visible connection points if necessary.
- Hairdryer (Low Heat Setting): This is a great trick, especially in colder environments or if joints feel very tight. A quick blast of low heat can slightly soften the plastic, making it more pliable and easier to separate. Use the LOW heat setting, keep the hairdryer a safe distance away (at least 6-8 inches), and heat only for a very short time (10-15 seconds). Focus on the joint or seam you're trying to separate. Avoid overheating, as this can deform or damage the plastic!
Set Up Your Workspace: Choose a well-lit, flat, clean area. It's a good idea to lay down a soft cloth or a silicone mat on your desk. This prevents figures from rolling away and provides a soft landing should anything accidentally drop. It also makes it easier to spot small parts if they come loose.
Step 2: Gentle Disassembly – Removing the Old Face
This is the core part, needs attention and patience.
Locate Seams and Separate the Head: The main seam connecting the head to the body is usually around the neck joint. Gently hold the Nendoroid's body in one hand and the head in the other. Apply slow, steady, upward pressure to pull the head straight off the ball joint at the neck. If it's tight, try wiggling the head slightly from side to side as you pull, or apply a brief, low-heat blast from your hairdryer to the base of the neck joint area before trying again.
Once the head is off, you need to separate the hair pieces to access the face plate. Find the seams between the front hair and the back hair, typically where they meet around the face's perimeter. Gently lift or pull the front hair piece upwards or outwards away from the face and back hair. Some complex hairstyles (like those with attached headphones, antennae, or delicate sculpted details) might require extra care. If detachable accessories are present, try to remove them first if possible. Be extra gentle with thin or pointy hair pieces and delicate accessories; they are prone to breaking if forced.
Remove the Original Face Plate: With the front hair (and potentially the back hair) removed, you'll see the face plate nestled within the head cavity. Look at the back of the face plate and the inside of the head – you'll typically see small pegs on the face plate or tabs on the head cavity that fit into corresponding slots or grooves. Using your fingernail (if it's long enough and firm) or the tip of your tweezers (again, with extreme caution!), gently pry at the edge of the face plate where it meets the head cavity. Start from one corner or edge and slowly work your way around, applying gentle, consistent pressure. The face plate should gradually loosen and pop out. Do NOT use excessive force. If you meet significant resistance, stop. Check if you missed a hidden connection point, try prying from a different spot, or consider a very brief, targeted bit of low heat from the hairdryer on the face plate area. The goal is a smooth separation, not a struggle.
Step 3: Bringing New Expressions to Life – Installing the New Face
Once the old face is out, putting the new one in is usually the easier part, but still needs care.
Clean Connection Points: Before inserting the new face plate, take a moment to gently wipe the inside of the head cavity (especially the slots or tabs) and the back of the new face plate (the pegs) with a clean, soft cloth or cotton swab. Dust, fibers, or tiny plastic bits left over from manufacturing or previous swaps can prevent the new face from seating properly or cause scratches.
Align and Insert: Take your chosen new face plate (whether it's a standard GSC expression or perhaps a unique one you got from a Diipoo custom order!). Align the pegs on the back of the face plate with the corresponding slots inside the head cavity. Ensure the face is oriented correctly (right side up!). Gently press the face plate into the head cavity using your fingers. You should feel it click or slide into place. Press firmly but not forcefully until the edges of the face plate are flush and seamlessly aligned with the head cavity.
If the new face plate includes a sculpted front hair piece attached to it (some specialty faces do), you'll typically need to assemble the face and its attached hair first, then install this combined piece into the back hair/head assembly.
Reassemble and Adjust: If you removed the back hair, align it with the head cavity and press or snap it back into place. Then, align the front hair piece with the pegs/slots on the back hair and face plate, pressing down until it sits snugly. Finally, take the fully assembled head and align its neck joint socket with the ball joint on the Nendoroid's body. Gently push the head down onto the body until it's securely attached. Give the head a gentle turn or press lightly on the face edges to ensure it's seated perfectly and the expression looks just right, with no awkward gaps.
Step 4: Pro Tips – Keeping Your Collection Pristine
Following a few basic rules will help keep your Nendoroids looking their best.
Avoid Excessive Force: We've said it before, but it bears repeating! Forcing plastic parts is a recipe for breakage. If something isn't budging, pause, re-evaluate, and try gentle alternatives like slight wiggling or minimal, controlled heat.
Store Small Parts Safely: Those extra face plates, tiny hair accessories, or other small parts can easily get lost or damaged. It's highly recommended to store them in small, labeled plastic bags (like mini zip-bags), compartmentalized storage boxes, or dedicated figure part cases. This not only prevents loss but can also help prevent color transfer if different colored plastic pieces are stored pressed tightly together for long periods (though less common with modern plastics, it's a good habit).
Be Mindful of Compatibility: Beyond the GSC vs. third-party body issue, sometimes even within the GSC line, specific series or figure types (like Nendoroid Dolls) might have slight variations in joint sizes or face plate shapes. Always do a quick check or try fitting gently first.
Prevent Paint Damage and Color Bleed: Be careful with sharp tools around painted surfaces. If you stack or store many face plates together, consider placing a thin sheet of plastic or paper between them to minimize any potential risk of color transfer over time, especially with very dark or vibrant colors against lighter ones.
Make Your Collection Uniquely Yours with Diipoo Custom Nendoroid: If you find that the official face plates don't quite capture that niche meme, specific reaction, or original character concept you have in mind, or if you simply want to stand out, Diipoo offers fantastic customization services! You can get custom face plates made with your own designs or unique expressions. Plus, Diipoo can even create custom accessories like tiny glasses, intricate hair ornaments, or other props. These Diipoo custom options take your Nendoroid hobby to the next level, allowing you to personalize your figures in ways standard releases can't, making your collection truly one-of-a-kind and filled with your unique vision and creativity.
Changing Nendoroid face plates is a rewarding part of the collecting experience. It's a simple action that unlocks a world of storytelling and display possibilities, allowing you to recreate cherished scenes or invent entirely new ones with your favorite characters.
Remember: patience, a gentle touch, and following these steps are key to a smooth and safe face swap. So, go grab your beloved Nendoroids, gather those extra faces (or perhaps that special one you ordered from Diipoo custom!), and confidently give them a fresh new look! Whether you're using official parts or adding a touch of personal flair with Diipoo's unique custom accessories and faces, the ability to change their expressions is what makes these figures so much fun.
Happy swapping and customizing! May your display shelves be ever-expressive and full of personality!